Tips and Tricks
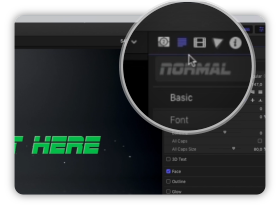
Title Inspector
You can adjust the text’s font,
alignment, color, and drop shadow.
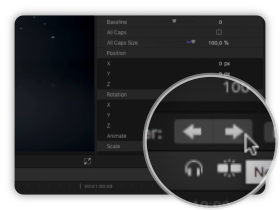
Next Text Layer arrow
The Previous and Next Text Layer buttons
also support Motion text edit markers.
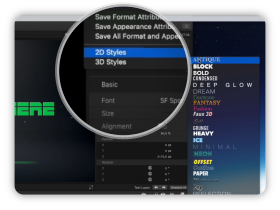
2D styles
Final Cut Pro X comes with preset text
styles that you can apply to text.
Tutorial Transcript
Hello, I am Florian Godard from CreativeMedias. In this tutorial I will show you some typography editing techniques using Final Cut Pro X.
First, before using my templates be sure to have installed the default font I used in the preview video. You will find the font download link in the Link.pdf document that comes with your purchased files. Download and install the font, and you are ready.
Open Final Cut Pro X and start with a new project. Click and drag a template in the timeline and select 30 frames per second, then click ok.
In this example I will use my template Action Texts. I will show you how to edit your texts and customise the design.
Select your generator and open the Published Parameters panel. You will find all the placeholders and be able to edit your texts and change colors here. These are basic and limited typography options and I added them mostly for Apple Motion 5 users. Because if you want to have a deeper control of your typography look, Final Cut Pro X give you easy and complete controls on texts in the Texts Inspector panel.
Click on it, and by default, no text is selected : you will have to click on the Next Text Layer arrow. Among all settings, Font is the most important, with Size and tracking. You can also choose a 2D preset to change the look quickly. Below you can add effects and also change color in the Face option. Please note that in some templates, all text colors are controlled by a unique color parameter that you can change in the published parameters.
But in this template, you have full control on it. And if you select part of the text, you can apply changes to it and create fun combinations with different font, colors, and size. You can also add additional lines.
When you want to edit the other texts, click on the the next and previous Text Layer arrow to navigate between the different texts layers.
I hope this tutorial has been helpful for you, thank you for watching!



Comments are closed.